Your Kid Is Already Telling You Where to Put the Toys
That trail of Legos from the playroom to the kitchen? Not chaos. A map.
That Lego trail from the playroom to the kitchen is a map, not a mess.
- Kids with play materials nearby engage deeper, build longer, and actually use what they have — instead of wandering room to room looking for you.
- The shift: stop organizing toys by category in one room — distribute them by proximity to where you actually are.
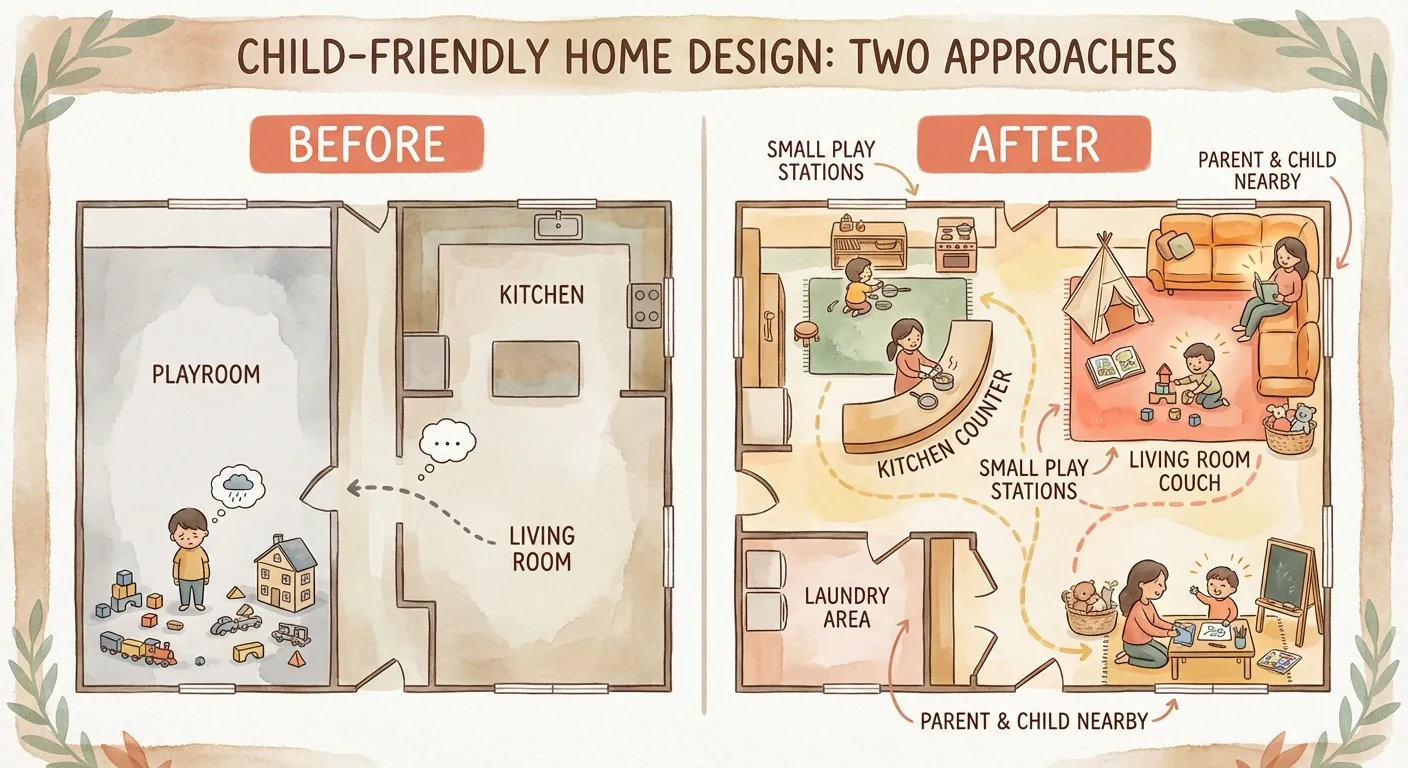
You set up the playroom perfectly. Bins labeled. Shelves organized. Art supplies in cute containers. And your kid? Grabs one truck, carries it to the kitchen floor, and parks it next to your feet while you chop onions.
You carry the truck back. They follow it. You redirect them to the playroom. They wander back with a crayon.
This is not a discipline problem. This is your child being extremely smart about something developmental researchers have known for decades: kids can't settle into play unless they can see you.
Young children choose proximity to you over access to their toys. Every single time. Stop fighting it. Design around it.
The "Follow the Drag" Rule
Here's the fastest diagnostic for where play stations should go in your house: look at where your kid keeps dragging things. That's the answer. They've already done the environmental design work for you.
The research backs them up. Environmental psychology and Reggio Emilia educators treat the physical space as an active participant in learning — not just a backdrop. And Montessori practitioners have confirmed it for over a century: when materials are visible, reachable, and limited in quantity, children engage deeper and longer.
Translation: where you put the toys matters more than which toys you buy.
Step 1: Find Your Anchor Spots
Walk through a typical day. Where are you for the longest stretches? Cooking, working from home, folding laundry, feeding the baby? Those spots — not the Pinterest playroom — are where play materials belong.
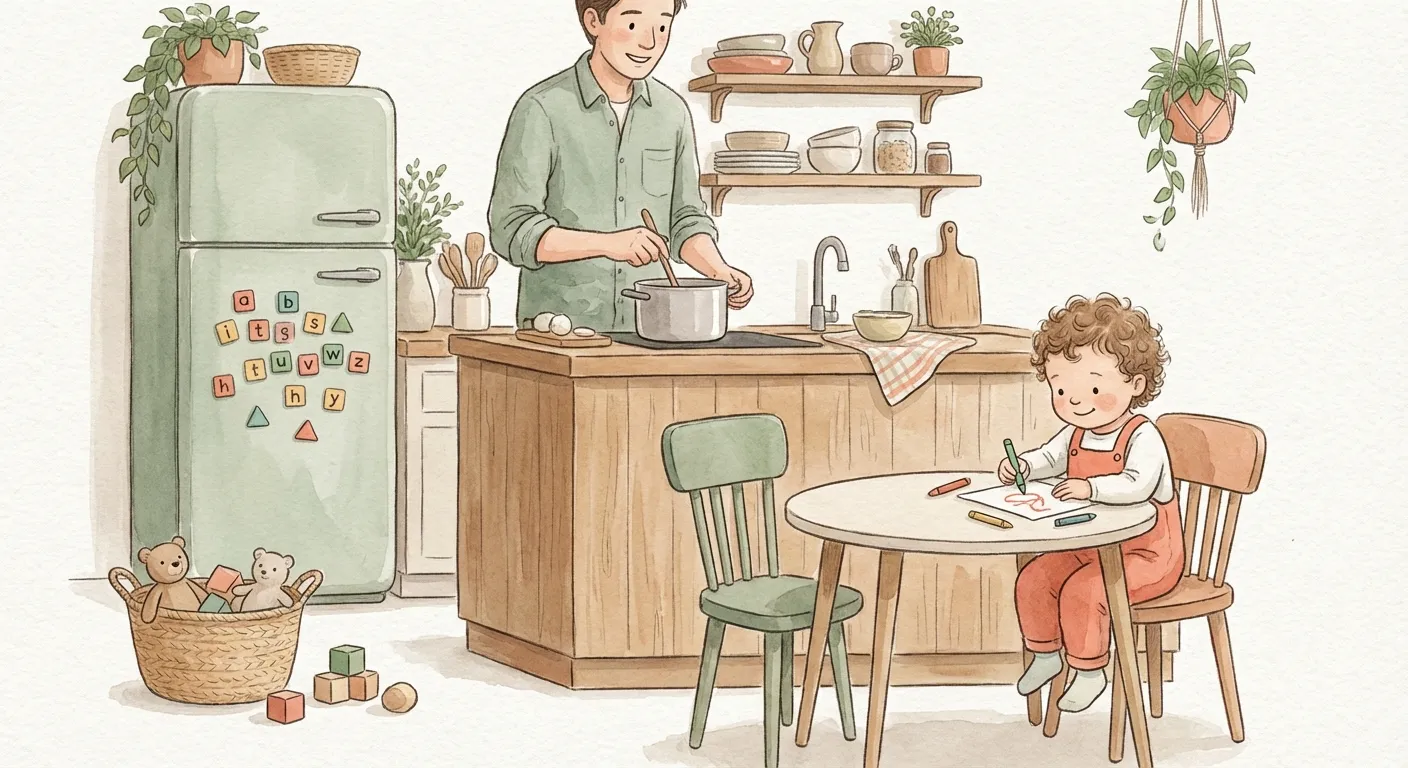
Kitchen
- Small table or cleared counter section
- Magnetic tiles on the fridge
- Crayons + paper in a reachable drawer
Living Room
- Low basket with current-interest toys
- Open floor space for building
- Core materials relocated from playroom
Laundry Area
- Bottom shelf with rotating toys
- Old magazines + kid scissors
- Washcloth basket for folding practice
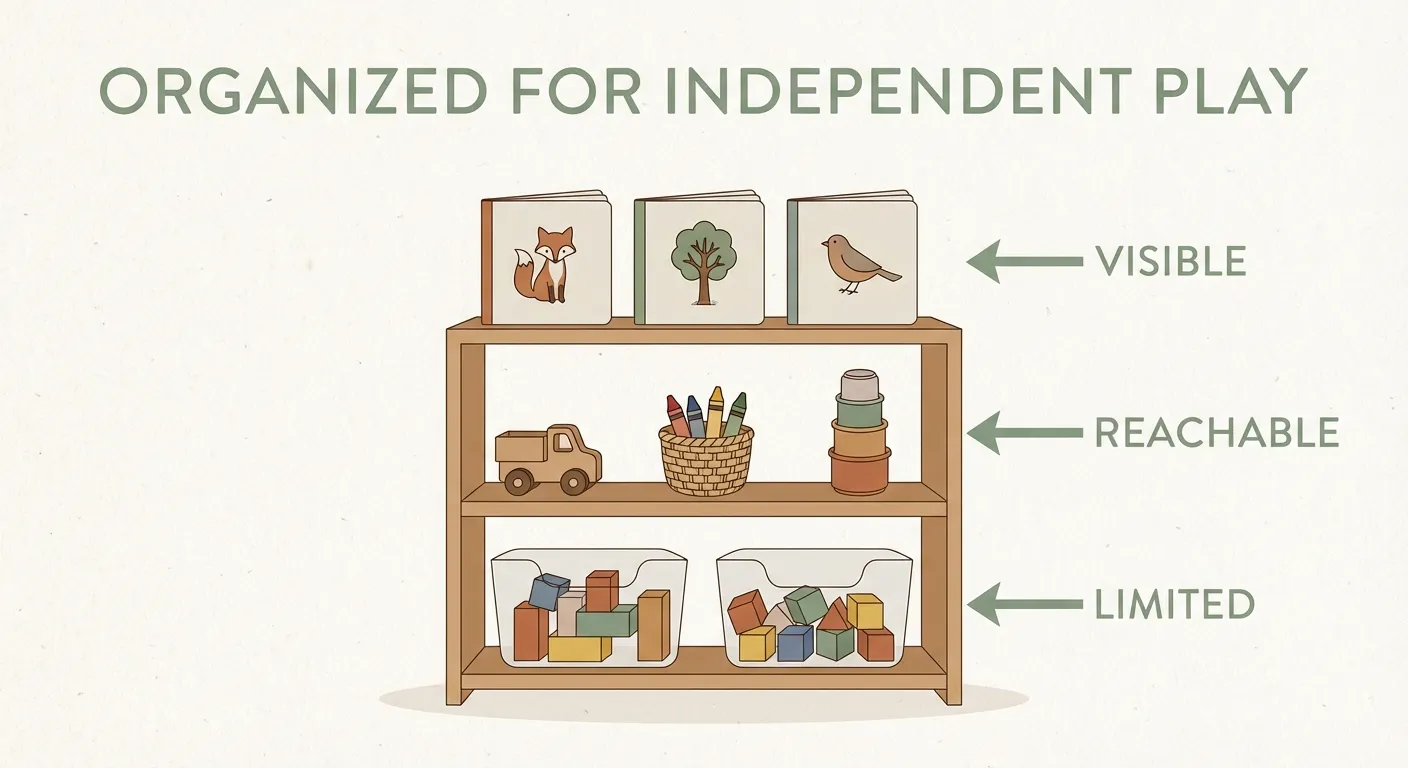
Step 2: Set Up for Independence
The goal is zero adult assistance required. Your child sees something interesting, grabs it, uses it, puts it back. No lid to pry off. No shelf too high to reach. No asking for help.
| Kills independence | Builds independence |
|---|---|
| Tall shelves with deep fabric bins | Low, open shelving at child height |
| Toys stacked in piles | Items displayed individually with space between |
| Closed cabinets hiding everything | Clear, lidless containers — see what's inside |
| 30+ options crammed together | 8-12 curated items matching current interests |
| Table pushed against a wall | Table reachable from all sides |
| No adult seating nearby | Comfortable chair so you can be present without hovering |
Step 3: The Portable Play Kit
You won't stay in one spot all day. When you move to the kitchen, bathroom, or nursery — bring one tray or bin of materials with you. Think of it as a travel kit. Your child's activity follows wherever your task goes.
Pick a tray or small bin
Something with handles that a child can carry too. A baking sheet works great.
Load it with 3-4 items
Crayons + paper. A few figurines. Play-doh + one tool. Don't overdo it.
Set it down where you land
Kitchen floor, bathroom doorway, next to the changing table. Your child follows you; the tray follows you. Done.
Keep It Working
The maintenance is minimal
A home where kids play has marker on the table and blocks on the floor. That's not mess — that's a child doing exactly what they're supposed to be doing. A mind at work.