The Drawing Game That Secretly Teaches Writing
Handwriting is not one skill. It is two completely different muscular mechanisms.
- Kids who train both mechanisms separately don't slowly learn to write -- they sit down and produce fluid letters on day one, stunning every adult in the room.
- The shift: replace alphabet drills with geometric shape-filling. The parallel lines train the exact strokes letters need.
Maria Montessori, educator and physician who pioneered hands-on learning for young children
That is exactly what Montessori documented over a century ago. Children who had never written a letter sat down and produced handwriting so fluid that observers were stunned. The secret was not some rare gift. It was a simple geometric tracing exercise that trained their hands while they thought they were just making art.
The technique is called metal insets, and the reason it works is almost comically logical once you see it.
Writing Is Two Skills, Not One
Most people think of writing as a single act: you learn the letters, you write the letters. Montessori noticed something different. Writing actually requires two completely separate muscular mechanisms working at the same time:
Mechanism 1: Letter Forms
- Memorizing the shape of each letter
- Recalling which strokes make a "B" vs a "D"
- Connecting letters into words
(Trained separately via sandpaper letters)
Mechanism 2: Instrument Control
- Holding the pencil with proper grip
- Controlling pressure evenly
- Making smooth, consistent strokes
- Staying within boundaries
The conventional approach jams both skills together: hand a kid a pencil, show them the letter A, and say "copy this." The child is fighting two battles at once -- remembering the shape AND wrestling with the tool. Messy results, frustration, slow progress.
Metal insets separate these battles entirely. Your child builds instrument mastery through geometry while letter knowledge builds through touch (sandpaper letters). Then one day, the two skills merge and writing just... appears.
How It Actually Works
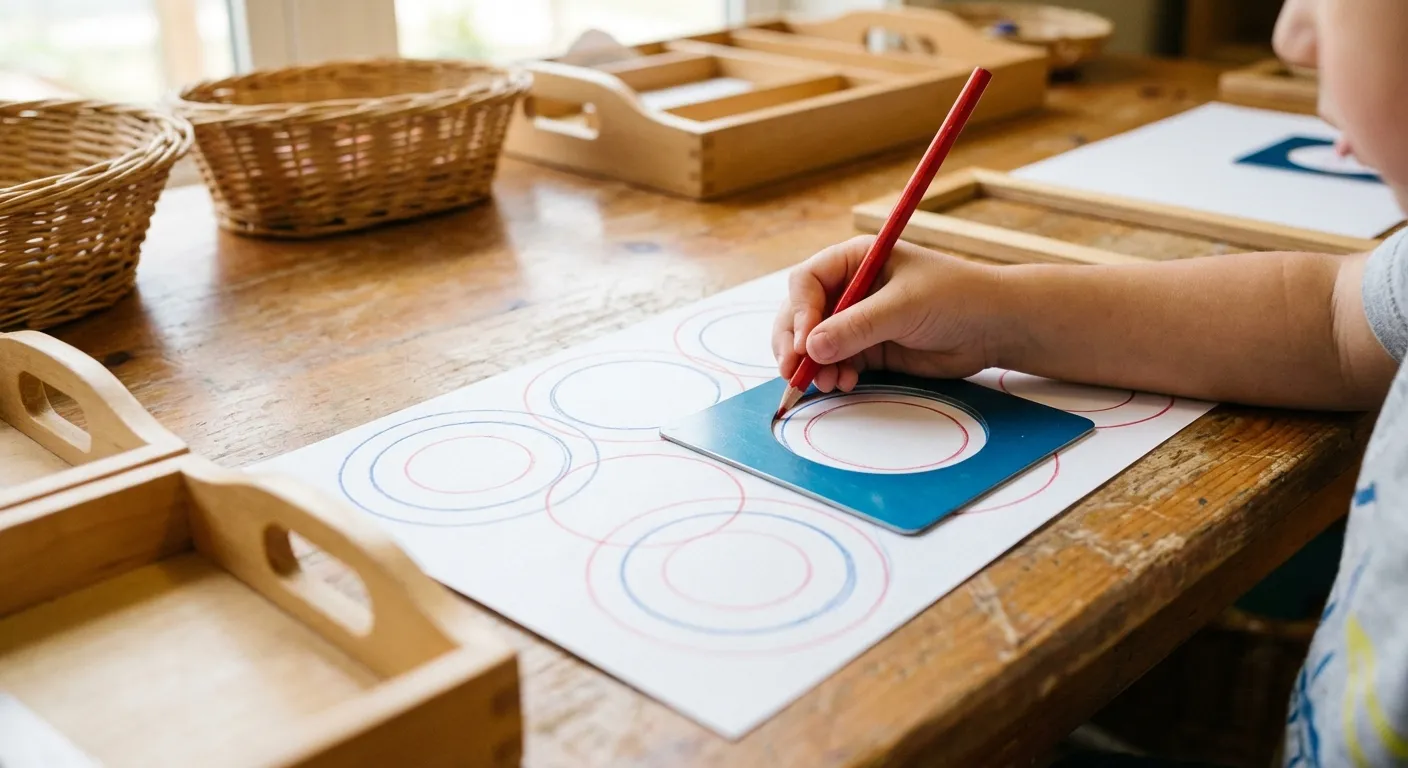
The materials are beautifully simple: flat metal geometric shapes (circles, squares, triangles, ovals) that fit snugly into matching metal frames. A handful of colored pencils. White paper. That is it.
Trace the Frame
Lay the metal frame flat on paper. Your child traces around the inside edge with a colored pencil -- blue, for example.
Trace the Inset
Remove the frame. Place the solid geometric piece inside the traced outline. Trace around it with a different color -- red.
Fill with Parallel Lines
Remove the metal piece. Fill the shape with straight parallel lines going in one direction, staying inside the boundaries. This is where the real pencil control training happens.
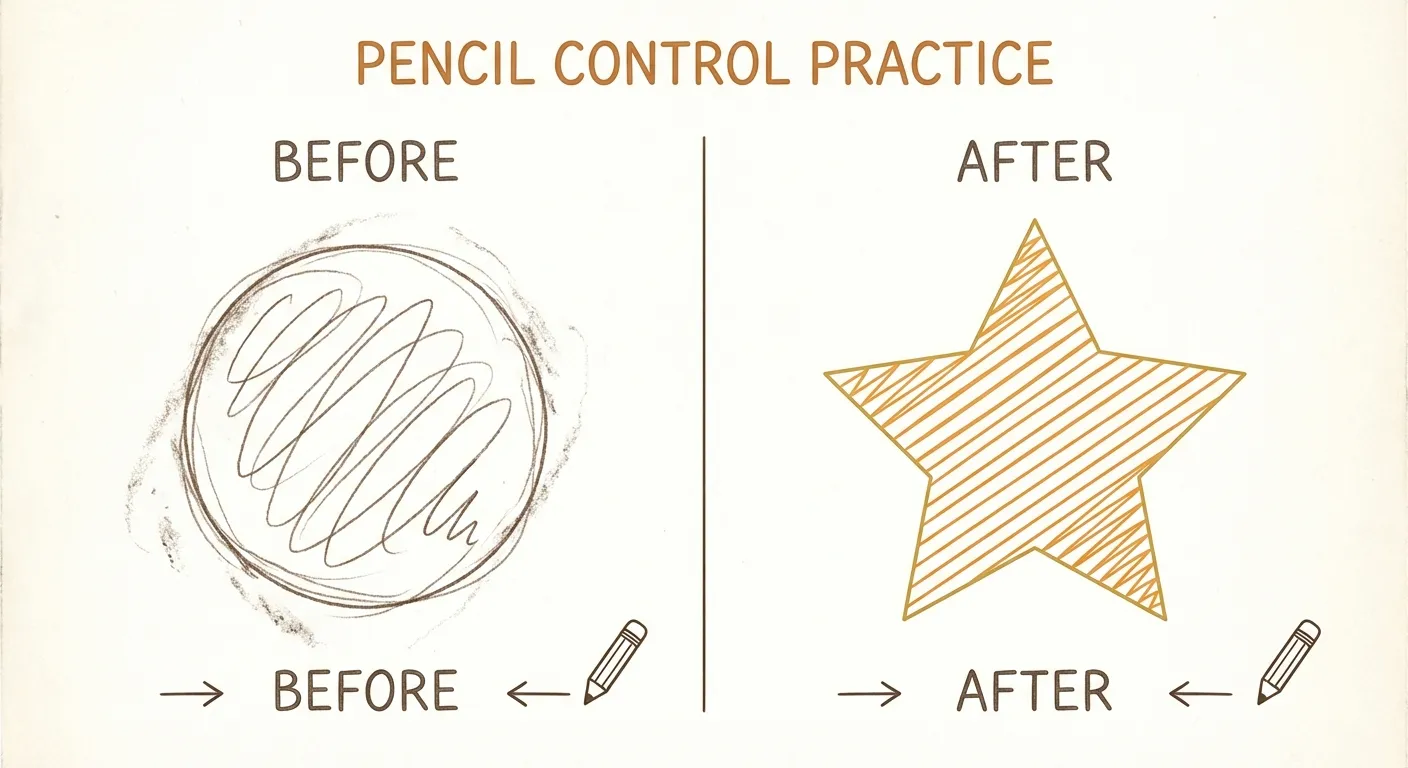
Cross-Hatch (Level Up)
Once single-direction lines are smooth, add a second layer of lines in the opposite direction. The cross-hatching pattern demands -- and builds -- genuine fine motor precision.
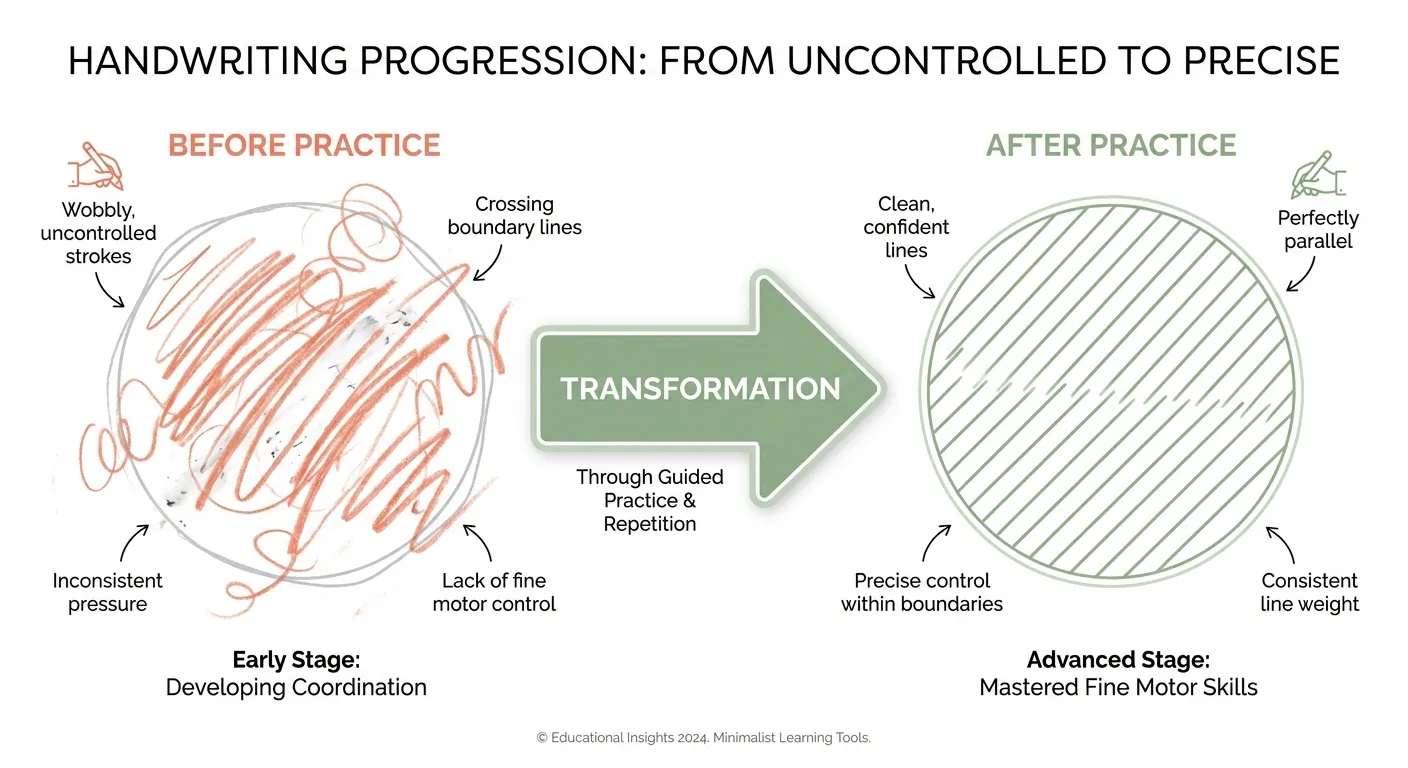
The transformation: from uncontrolled strokes to precise, parallel lines within boundaries.
Why Kids Love It (and Keep Doing It)
This is the part that makes it a kung fu move: children do not experience this as handwriting practice. They experience it as art. They are choosing colors, making patterns, filling shapes -- the kind of thing kids will do for 30 minutes straight without being asked.
Meanwhile, every single stroke is training the exact muscles they will need for writing:
| What They Think They're Doing | What's Actually Training |
|---|---|
| Tracing around cool shapes | Pencil grip and steady pressure |
| Coloring inside the lines | Boundary awareness and spatial control |
| Making straight lines | The up-and-down stroke motion used in writing |
| Cross-hatching patterns | Multi-directional control and fine motor precision |
| Picking different colors | Sustained engagement (30+ minutes of practice they chose) |
The Progression Path
Start simple and let complexity build naturally. There is no rush here -- the child's improving control tells you when they are ready for the next level.
From First Try to Mastery
Before and after: the same child, same pencil, completely different control.
DIY or Buy?
Official Montessori metal insets run about $40-60 for a set. But you can start tonight with materials you already have:
| Montessori Original | Tonight's Shortcut |
|---|---|
| Metal geometric frames + insets | Cookie cutters, jar lids, or stencils as tracing shapes |
| Colored pencils (standard) | Colored pencils (you have these) |
| White unlined paper | Printer paper or blank side of junk mail |
The key is the filling step. Tracing a shape is nice, but the parallel-line fill is where the real instrument control develops. Make sure that part stays in the game.
The Payoff
Without ever practicing a letter, your child builds:
When letter knowledge and instrument control finally combine, children don't slowly learn to write. They explode into it -- producing beautiful letters on their very first real attempt.
Published by kungfu.family. Metal insets for pencil control -- developing instrument mastery separately from letter forms, a technique developed by Maria Montessori through decades of classroom observation.